Pages

Search All Things 40K

Monday, January 14, 2013

5-Step Purple

I've been in a Tyranid kind of mood for a while, thought I'd share how I do purple with the new paint line.

Step 1: Naggaroth Night
This needs to be laid on heavy on all areas where you're doing purple.  It's very dark, but will show through on crevices.

Step 2: Genestealer Purple
I painted this rather heavily on all raised areas, leaving the Naggaroth to show through in recesses and crevices.  This is the main color for our purple, and is a little bright for my taste, but will be toned down by the end.

Step 3: Pink Horror
As this is a flesh tone for my Tyranids, I'm looking for a little variation in the highlights to keep things interesting (similar to how I use yellow as the highlight for Orks).  As a highlight, keep it to very raised areas, edges, or places you want highlighted to to object source lighting.

Step 4: Kindleflame
This is a dry paint, and is your final highlight.  Stick really only to edges and as finishing spotlights along very raised edges.  The model now should look way too bright, and that's usually ok in my book as I like to finish off with a shade to tone everything down and tie colors together.

Step 5: Druchi Violet
Lay it on thick.  This will help to blend the different colors you got going on and reign in the extremes

Monday, November 19, 2012

5-Step Gold

How to paint gold with the new GW paints.
Following out of the Black and Bone tutorials, let's get gold out of the way. If you're doing Black Legion, these three should get most of your model done.

Step 1: Balthasar Gold
This is a Basecoat step, so make sure you coat the area rather thickly. I used to basecoat my golds with a warm brown in the older line of paints, but now there's a metallic for that.

Step 2: Gehenna's Gold
This is brighter, and has more red in it than the basecoat. The idea here is that we're working up a few layers for an overall effect that you can't get with just one step; like getting Candy Apple Red on a car. Coat this rather liberaly over the gold area, keep out of the crevices. (also note, in the model above, I based the bullet chain out of the gun, but am not taking it further.  I actually want a coppery color for them.)

Step 3: Auric Armour Gold
Auric Armour is a very bright yellow color. The application will be similar to above, this isn't a highlight, we're using it as a layer... though don't lay this on too thick as it will overpower. Keep it to a thin layer.

Step 4: Agrax Earthshade
Now we're getting somewhere. With the basic gold layers all set out and looking bright and shiny, let's bring it down with some brown shade. This will give us the depth and definition we want as well as tone down the gold.

Step 5: Golden Griffon
Our final step is the highlight. Golden Griffon is a dry paint, meant to be used with a drybrush technique. With that in mind, dust this over edges and raised areas to give the gold that tarnished, aged look.

...and the gold is done!

Monday, October 29, 2012

5-Step Bone

Working on painting up some Chaos Terminators. On this model, I've done the 5-Step Black as well as a quick Leadbelcher plus Nuln Oil for the metal parts. Time to do the bone.

Step 1: Zandri Dust
Lay on the basecoat nice and thick.

Step 2: Ushabti Bone
Working with layer paints is interesting. Not thick like the base paints, you can get some good blends with little effort. This was painted in raised areas rather heavy-handed, just staying out of creases and the like.

Step 3: Screaming Skull
Screaming Skull was applied in similar fashion to the step above, but less of it, and not covering as much area. Raised areas, and large flat(ish) surfaces like the forehead of that giant skull, but staying even further away from creases in order to let some of the Ushabti Bone layer show through.

Step 4: Seraphim Sepia
Shades are my best friend. It's a shame there's only 4 glazes, otherwise I'd probably make a 6-step, but we're going to use the Sepia as both a shade and a glaze. It should smooth out the transitions between the two layer paints as well as give a nice dark shade.

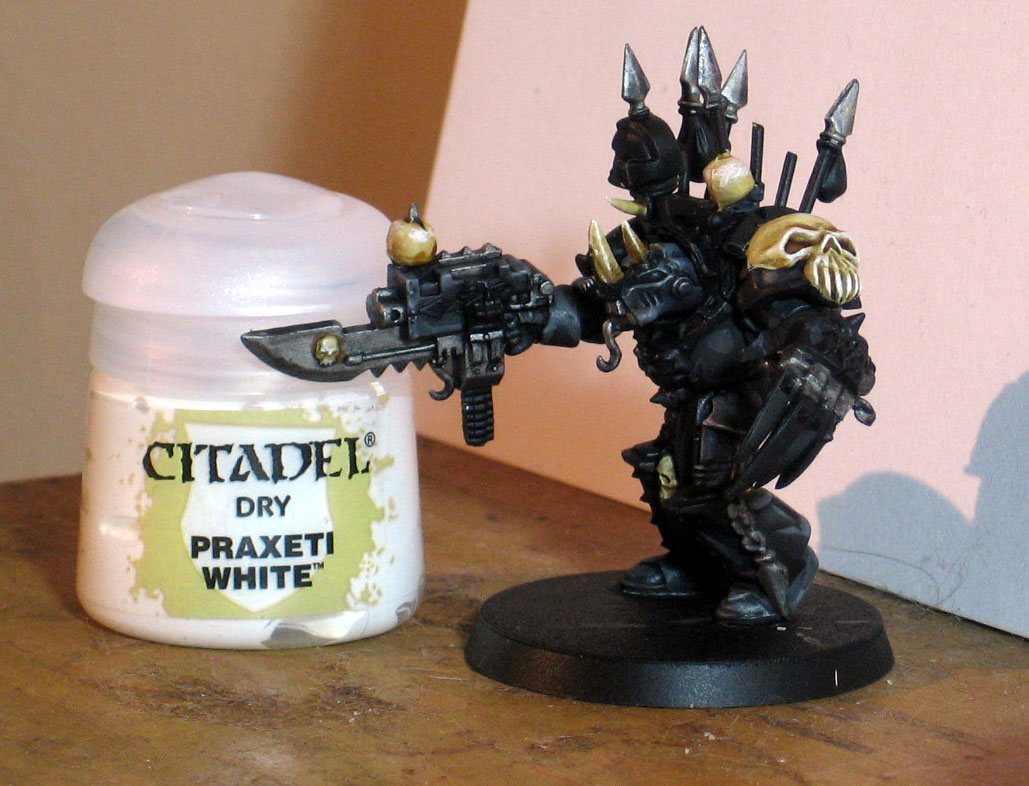
Step 5: Praxeti White
This was very lightly dry-brushed over edges and the like to highlight. Don't get too heavy handed with this as there is no glaze step afterwards to smooth it out.

Monday, October 22, 2012

5-Step Black


Painting black armour (or white, for that matter) always poses a problem, because you're typically missing out on either a shade or a highlight. If your midtone is white, you've got nowhere to go for a highlight. If your midtone is black, you have nowhere to go for a shade. So, what's the answer to this? For me, it's to fake to an "almost black" (and likewise, an "almost white" in the other case). Given that the new Chaos Codex came out a little bit ago, I got bitten by the bug again to get back to my Black Legion. It also helps that I just recently switched jobs to a much more sane work schedule, allowing me time to actually enjoy a hobby again, praise the Emperor.

So I've been playing around with the new paints, and I kinda like them. The "dry" paints were weird at first, but I'm really starting to dig them. In my playing around, I've found the basic guide on GW's site to actually be quite helpful (Link). Their color suggestions for "sheer black" looked promising, but after trying it out, I preferred a different order...

Step 1: Abaddon Black

Or the old "chaos black" ... same thing, new name. I generally base the whole model with this, so I rarely even call it a "step"

Step 2: Eshin Grey

I painted this over all areas that I intend to make black, while keeping it out of crevices. This is our mid-tone black, which will be made darker after the last step.

Step 3: Dawnstone

This is our first highlight. I use it to line the edges of armour that is in dark areas, and lay it on a little thicker in areas that should be brighter due to light source.

Stpe 4: Longbeard Grey

This is our second highlight. Use it sparingly, and only in areas that really need it. For example, if it's an area that was heavily applied with Dawnstone due to light-sourcing, then edge with Longbeard. If it's a darker area where you only edged with Dawnstone, don't use Longbeard.

Step 5: Nuln Oil

This should bring everything back down to a darkness that is favorable for black armour. In addition, it helps the different greys blend in a little more. We're using it as a shade AND a glaze! Bonus! :D

It might be a little hard to really see the "black" because the rest of the model is still left in its Abaddon Black basecoat, and is thus darker, so...


Here's the finished model to give you an idea of how that black fits in with the rest. It's not really the final step for this particular model, to be honest, because I like my Khorne Berzerkers a bit bloodsplattered ... but skipping straight to that step would kinda defeat the purpose of showcasing the black armour.


And here's the blood-splattered version, in-case you were wondering. :)
Let me know what you think!
Related Posts with Thumbnails

Google Analytics