For Part 2, we're going to deal with a much smaller magnet, requiring a finer level of skill.
If you haven't already, I would suggest trying your hand at the larger magnet uses covered in Part 1 before attempting to use these. Undue frustration helps no-one.
On to the further uses of the large magnets as well as some smaller ones. For our primary example, I give you my new Space Marines Commander:


 There are two magnets installed in the model above. The first is the same size covered in Part 1. It is lodged in his left shoulder. The shoulderpad was glued up at the top so that replacement arms can be easily slid into place underneath the shoulderpad.
For the second magnet, I used a 1/16" diameter disc magnet (1.5mm). You can find it here. It's the smallest size they carry over at Gaussboys. Compared to the magnets covered in Part 1, these are half the diameter and half the width. With 3 dimensions cut in half, you're left with a magnet that is 1/8 the size of the already small ones covered! Look at it embedded in the wrist above! It's tiny! Be very careful handling them, getting them near other magnets can cause them to violently propel themselves towards the other magnetic field (given that their mass is so low).
How To Use Them
As in Part 1, the first step is to drill a small hole where you want the magnet mounted. For this, I use a 1/16" drill bit in a pin vise. Glue the magnet in. LET IT DRY.
Next up, take another small magnet (one that you plan to embed in the gun-holding hand) and let it stick to the embedded magnet in the wrist. Use a permanent marker to mark the side facing out. When you are done drilling a hole in the hand, prepare to glue in your second magnet. Since you marked the side facing outwards, that mark should go IN the hole. You should not see the mark when it's mounted in the hand.
How this has worked for me:


The magnets are still quite strong despite being so tiny. I have nearly every equipment option for the Commander that is available in the new SM Codex. The only things left for me are to convert a Thunder Hammer and a Combi-Flamer.

Magnetize the shoulderpad separate from the arm. Why would I do that?!? It's just more work!!
In case you'd like to have multiple shoulderpads in order to paint a god-specific Mark on it. Suddenly, your one model can bear the mark of any god he wants simply by swapping out the shoulderpad.
The method of how follows similar to above, though this took a little trial and error for me, mainly in finding the right spot for the magnet. Given that there is a larger magnet already mounted in the shoulder of that same arm, keep in mind that the smaller one will align itself according to the larger. Also, it will want to sit parallel with it. In the picture above, you'll notice an empty hole about mid-shoulder. The magnet didn't want to go there ... and (it's hard to see from the light reflection) the actual magnet is mounted below the empty hole where it sits parallel to the larger one. For where to mount the matching magnet in the shoulderpad... about here:
 It's the gold dot in there...
Here's a better look at the back of the shoulder again:
If you haven't already, I would suggest trying your hand at the larger magnet uses covered in Part 1 before attempting to use these. Undue frustration helps no-one.
On to the further uses of the large magnets as well as some smaller ones. For our primary example, I give you my new Space Marines Commander:
There are two magnets installed in the model above. The first is the same size covered in Part 1. It is lodged in his left shoulder. The shoulderpad was glued up at the top so that replacement arms can be easily slid into place underneath the shoulderpad.For the second magnet, I used a 1/16" diameter disc magnet (1.5mm). You can find it here. It's the smallest size they carry over at Gaussboys. Compared to the magnets covered in Part 1, these are half the diameter and half the width. With 3 dimensions cut in half, you're left with a magnet that is 1/8 the size of the already small ones covered! Look at it embedded in the wrist above! It's tiny! Be very careful handling them, getting them near other magnets can cause them to violently propel themselves towards the other magnetic field (given that their mass is so low).
How To Use Them
As in Part 1, the first step is to drill a small hole where you want the magnet mounted. For this, I use a 1/16" drill bit in a pin vise. Glue the magnet in. LET IT DRY.
Next up, take another small magnet (one that you plan to embed in the gun-holding hand) and let it stick to the embedded magnet in the wrist. Use a permanent marker to mark the side facing out. When you are done drilling a hole in the hand, prepare to glue in your second magnet. Since you marked the side facing outwards, that mark should go IN the hole. You should not see the mark when it's mounted in the hand.
How this has worked for me:
The magnets are still quite strong despite being so tiny. I have nearly every equipment option for the Commander that is available in the new SM Codex. The only things left for me are to convert a Thunder Hammer and a Combi-Flamer.
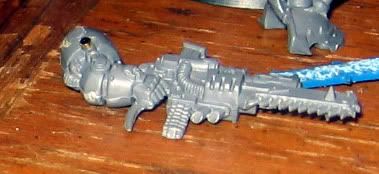
Another way to use the small magnets? Let's move to another example; A Chaos Terminator Lord.
Magnetize the shoulderpad separate from the arm. Why would I do that?!? It's just more work!!
In case you'd like to have multiple shoulderpads in order to paint a god-specific Mark on it. Suddenly, your one model can bear the mark of any god he wants simply by swapping out the shoulderpad.
The method of how follows similar to above, though this took a little trial and error for me, mainly in finding the right spot for the magnet. Given that there is a larger magnet already mounted in the shoulder of that same arm, keep in mind that the smaller one will align itself according to the larger. Also, it will want to sit parallel with it. In the picture above, you'll notice an empty hole about mid-shoulder. The magnet didn't want to go there ... and (it's hard to see from the light reflection) the actual magnet is mounted below the empty hole where it sits parallel to the larger one. For where to mount the matching magnet in the shoulderpad... about here:
It's the gold dot in there...Here's a better look at the back of the shoulder again:
Different angle, but I think you get the picture.