 Now I finally have a normal Dreadnought in addition to my Venerable Dreadnought. The prime difference between them is that this one's got options. The venerable was done before I had really figured out ways to make them interchangeable.
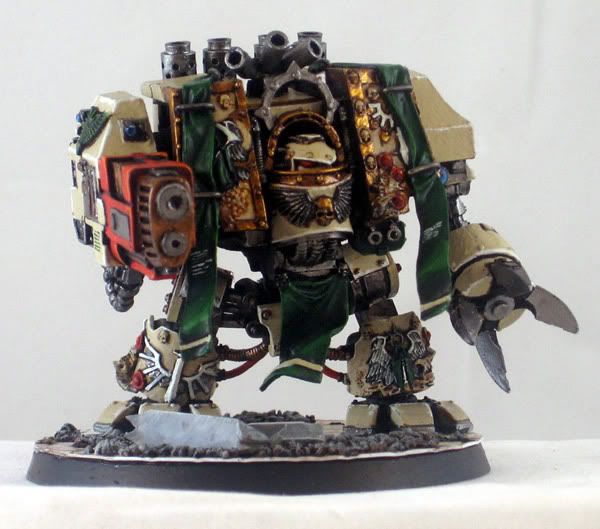
Ok, The pieces for this particular build came from a few different places. Most of it was from the standard SM Dreadnought Box. The DA bits all came from the Ravenwing vehicle sprue (sarcophagus plate, leg plates, some scrolls and the DA icon mounted on top). The last bit that's new is I snagged a Multimelta arm from the Black Reach box set. There's only a little bit of magnetizing going on (and I'll show it specifically). All the arms actually fit snugly "dry" on the arm pegs with the sole exception of the Multimelta. The hole in the arm is too small. get out a drill bit that's large enough and make it bigger. It'll fit eventually. ;)
Step 1: Basecoat
 Also pictured, the package of plasticard that I get for the base.
 The only magnetizing on this model is to switch out the Storm Bolter with the Heavy Flamer on the Close Combat Arm. Above, I've highlighted where the magnets are. I go over the "how to" in these posts (part 1, part 2). The magnets used are a 1/16" diameter disc magnet (1.5mm). You can find it here. It's the smallest size they carry over at Gaussboys.
What I've done (as I know it's a bit hard to see) is replaced a section of the arm's "tab" with the magnet, and drilled a hole within the slot of the weapon. I've made a diagram to hopefully illustrate this better than I can describe:
 This way the pieces still fit together in a slot-tab fashion with the addition of a magnet.
Step 2: Basecoat mix 2:1 Dark Angels Green : Knarloc Green
 I have an interesting method of getting a Dark Angels finish. As with most of the effects I do, I want to build bright, then darken with a wash. I've tested a lot, and found that for what I want, a 2:1 mix of Dark Angels Green and Knarloc Green will give me the desired effect. Also, the addition of Knarloc means the paint will be nice and thick, ideal for a basecoat.
Step 3: Gretchin Green drybrush
 This is the highlight step of my typical 3-step process (basecoat, highlight, wash). I'm focusing mainly on edges here, and avoiding the flat surfaces.
Step 4: Boltgun Metal
 First up, all metal parts get a basecoat, but in addition (because this is a vehicle) I've very lightly drybrushed in specific places over the green to get some weathering in before the wash.
Step 5: Shining Gold

Step 6: Badab Black wash
 Lay it on nice and thick, you want to bring that bright green down to an acceptable tone. I realize this may be brighter than some are used to for DA (partly due to GW's inconsistent depictions of their colors over the years/codices), but this is about the shade that I have come to like for them.
Step 7: Dheneb Stone Basecoat
 For all scrolls and skulls.
Step 8: Mechrite Red Basecoat
 For all purity seals and miscellaneous parts you want accented in red.
Step 9: Blood Red drybrush

Step 10: Fiery Orange highlight

Step 11: Devlan Mud wash
 This is on both the Dheneb Stone stuff, and the red stuff.
The reds are finished, now we're going to go back to the scrolls and skulls.
Step 12: Bleached Bone drybrush

Step 13: Skull White drybrush
 much lighter than the Bleached Bone. Feather it along scroll edges and around the "face" of skulls, i.e. the eye-sockets and jaw.
Step 14: Gryphonne Sepia wash
 This should be applied strategically (as opposed to covering everything) to the mid-tone areas near the Devlan Mud creases. Try to stay away from edges where there is Skull White, this isn't meant to tone that down.
Ok, next up, I've got a Multimelta and a Heavy Flamer that I want to try a trick on. I want some heat corrosion on the barrels.
Step 15: Devlan Mud wash
 Cover about 2/3 of the barrel's length from the tip. Typical heat corrosion goes from the metal's base color to brown to indigo to black at the very tip. We want to leave some room for those other two colors.
Step 16: Leviathan Purple wash
 Cover about half of the barrel's length from the tip.
Step 17: Badab Black wash
 Cover the last third of the barrel's length from the tip. Voila!
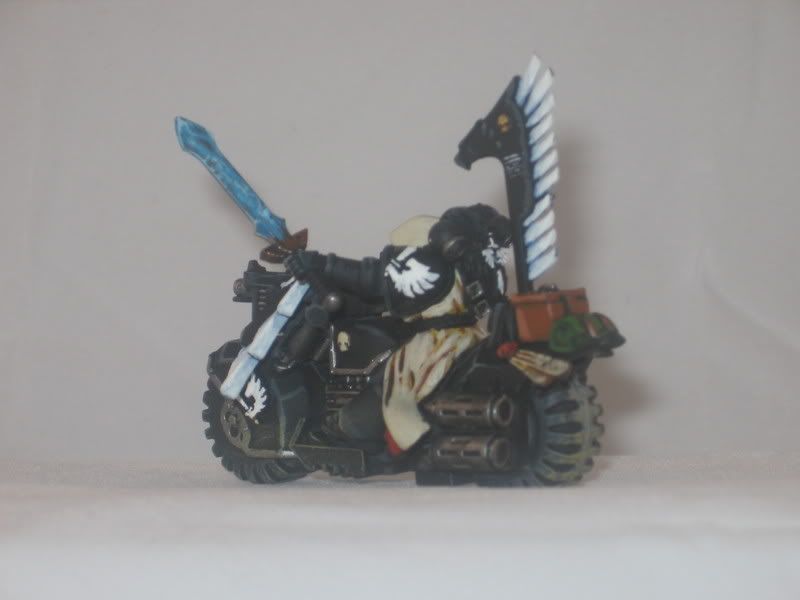
 Next up, there's a technique I've been using on my whites that I first crafted on my Ravenwing Bikers. it's a cool white, meaning we're going to work up from a blue.
Step 18: Shadow Grey Basecoat
 This is as dark as it gets.
Step 19: diluted Skull White
 There will be two total Skull white steps. In this first one, the paint is diluted to still show some of the blue underneath. This is applied very carefully to only the raised areas. Also, I leave a tiny bit of the Shadow Grey alone in areas I want to appear very deep.
Step 20: Skull White
 This time the paint is not diluted. In the case of the feathers, I've only put this on the last third of each feather, to leave the blue showing through on the rest. Also, you may have noticed I applied a freehand wing on that large blank space on the dreadnought's front, and hit the missiles.
Next up, targeting lenses...
Step 21: Enchanted Blue
 Enchanted Blue is still in production, I just still have an old pot of it.
Step 22: Deadly Nightshade
 Ok, Deadly Nightshade is not in production anymore... technically. They basically made it a foundation paint and called it Necron Abyss. It's equally as usable in this step.
Step 23: Ice Blue
 A small rim of Ice Blue on the opposite side as your Necron Abyss (Deadly Nightshade).
Step 24: Skull White
 A tiny spot of white in the middle of your dark area for the actual reflection point of your light source.
Step 25: Chaos Black
 Barrel holes and script on scrolls. My dreadnought's name is Remiel.
The models is ready. On to the base...
Step 26: cut out the plasticard
 I've drawn a circle on the backside of the plasticard with a pencil and the base itself, so I can easier cut it out with my scissors.
Step 27: PVA Glue and basing material
 I used some GW gravel. typically what I do to these is place some glue on the base, pour some gravel on the base... let sit... shake off loose/excess gravel back into container... apply watered down glue over the gravel. This will keep it sturdy.
Step 28:
 I want the gravel to resemble crumbled ceiling/infrastructure, so I'm painting it Codex Grey
Step 29: Skull white drybrush
 on the gravel.
Step 30: Fun with Washes! :D
 Ok, I'm going for a look of an old tiled floor left to nature's devices for a while. This also was the result of a lot of testing. The mix I use now is a 3:2:2:1 mix (Water:Devlan Mud: Badab Black: Thraka Green). I only wanted a touch of green and brown, and I flood the base with it. I actually want it to dry unevenly with some rings/discoloration. So while wet, I will touch some diluted Thraka Green or Devlan mud to an area and let it spread as it will. I'm sorry I don't have separate pictures for all that, but it must be done pretty quickly so that it doesn't dry before you're done.
There you are! Glue him down and you're set!


What do you think? Did you find this useful? Any tips or tricks that you use that are similar? Maybe suggestions for me (some area where you feel I could improve)?
Thanks for reading :)