 Contestant 3 won in the recent contest for a painted AoBR Captain. That means either a lot of you like Imperial Fists, or a lot of you wish the secret hell upon me that is painting yellow. ;)
Either way, I'm up for it. Yellow it is! Onward the Banana-Knights of the Emperor!
Step 1: Basecoat

Step 2: Iyanden Darksun
 Yellow basecoat for the yellow bits.
Step 3: Golden Yellow
 Nice and bright. This process would have been so much worse without foundation paints.
Step 4: Devlan Mud
 I coated the yellow in this wash to get all the depth. We'll work the yellow back up from here.
Step 5: Golden yellow
 Build it back up.
Step 6: Gryphonne Sepia
 Similar to that 5-step bone process that I do, the Gryphonne Sepia brings back some of the mid-tone after we've painted over a wash.
Something else to note, at some later point I came to the realization that the yellow was too orange. There is another step that should go here, but in this process I didn't apply it until the very end.
Step 7: Mechrite Red
 Onto the reds.
Step 8: Blood Red

Step 9: Fiery Orange
 Along the shoulder pad rims, this was lined along the edges. For the cape, this was drybrushed along edges and folds.
Normally for the reds, the next and final step I take is a Devlan Mud wash. However, there are a few other things that will need a Devlan Mud wash, so I'm going to set them up first...
Step 10: Charadon Granite
 This is the base for anything black. I'm mainly working towards the scroll on the banner here.
Step 11: Fortress Grey
 This is an edged/drybrushed highlight on all the "black" items that were based in Charadon Granite.
Step 12: Dheneb Stone
 The tabard, parchments, scrolls, skulls and skin.
Step 13: Vermin Brown
 Ignore the old pot, this color is still around (though called Vermin Brown). This was for the leather pouch, sword handle and the ropes across the chest.
Step 14: Bronzed Flesh
 Bronzed Flesh makes a great pre-wash highlight to the leather/rope bits that were based in Vermin Brown.
Step 15: Shining Gold

Step 16: Mithril Silver
 My new(ish) favorite way to highlight gold is to drybrush with Mithril Silver before washing in Devlan Mud.
Step 17: Devlan Mud
 OK. This is the final step for the reds, golds, and leathers. This is the second step (of 5) for the scrolls, tabard and skulls.
Step 18: Bleached Bone
 This is the third step for the scrolls, tabard and skulls.
Step 19: Astronomican Grey
 For the imperial eagle on the banner, I want to try a faux gold. I saw an easy NMM gold effect on another blog that I can't for the life of me remember. It was done on The Sanguinor. If anyone remembers where that article was, please shoot me a link. Found it: I saw it on The Vanus Temple.
Step 20: Skull White
 This was drybrushed over the imperial eagle, over the captain's face, and was also step 4 for the scrolls, tabard and skulls.
Step 21: Gryphonne Sepia
 This finishes off the scrolls, skulls and tabard. Also this went on the imperial eagle. It's not enough though; we're going to want a second coat.
Step 22: Gryphonne Sepia (the sequel!)
 Again on the imperial eagle. I think this is dark enough. This shows some promise, I'll have to try this a few more times to get the hang of it. Also, as an aside, this step is where I finally realized there's a scroll on his gun. I quickly painted that up in between steps; I hope you'll forgive the omission. ;)
Step 23: Ogryn Flesh
 Face!
Face!Step 24: Boltgun Metal

Step 25: Skull White
 His hair looked kinda cool with the whitish look in previous steps, so I'm making it actually white.
Step 26: Badab Black
 This was applied over anything based in Charadon Granite, and most of the Boltgun Metal (not the sword, we're going to do something else with that).
Step 27: The Revenge of Skull White
 I've been playing around with a new fun way to do power-weapon effects. First step was basing in the Boltgun Metal. Second step is applying where the electricity is crackling through the weapon with white. I mostly "cheated" and had the electricity hug edges and the middle line, arcing from edge to edge and then focusing at the tip.
Step 28: Asurmen Blue
 Dowse the blade.
Step 29: Return of The Revenge of Skull White
 This was then applied to the tip edges, and areas where the bolts forked off. It gave it this cool kind of coursing-power look. I don't know if you guys will all like it as much as I do, but the great thing about this is that you now know how to make several different colors of power weapon ... simply by substituting the wash with one of the other colors. I'm pretty psyched about that.
Step 30: Enchanted Blue
 Playing off of the blue in his power weapon, I'm going to make the bionic lens and the chest jem blue as well.
A quick word on the choice of blue here. I found a great article that goes into a little color-theory, and explains it quite well. I may be referencing it quite often in some of my posts in the future. It was written by SandWyrm from The Back 40K. Before I used blue for the sword/gems, the model mostly had an analogous harmony; it used colors mostly in the red to yellow range of the color wheel. What I was looking for in the end was a Split-Compliment, some color to contrast the current analogous colors. Immediately across from the yellow-to-red range was blue. This is a great tool for choosing complimentary colors and color schemes for your models. I would highly recommend reading and book-marking that article for your own further use.
Step 31: Regal Blue
 Upper corners of the lens and gem.
Step 32: Ice Blue
 A slight rim around the bottom edge of the lens/gem.
Step 33: The Undead Bride of Skull White
 Applied as a dot in the middle of the Regal Blue areas.
Step 34: Blood Red
 I found a detail in the model that I had neglected: the cross-shaped spikes behind the skulls in both his belt-buckle and right knee. I quickly touched them up with red.
Step 35: Chaos Black
 Gun Barrel hole, scroll writings (the banner scroll is currently empty as I'm letting the contest winner decide what he wants written across it), and a semi-circle on his chapter-heraldry shoulder pad. I fished in the SM book for the chapter's icon, it is a black fist in a black-rimmed circle of white.
Step 36: Skull White - Resurrection!
 for the interior of the chapter icon circle.
Step 37: Chaos Black
 The majority of the icon would be covered by the cape, but I wanted a hint of what was there. I applied a small notch near the bottom where you might see the edge of the gauntlet.
Step 38: Dheneb Stone
 With the model done, I'm moving on to the base. For this, I want to emulate the contest winner's army. Check out his models. if you zoom in there, the brown is somewhat uneven (like a marble effect). Some have grass on them. This is what I'm aiming for.
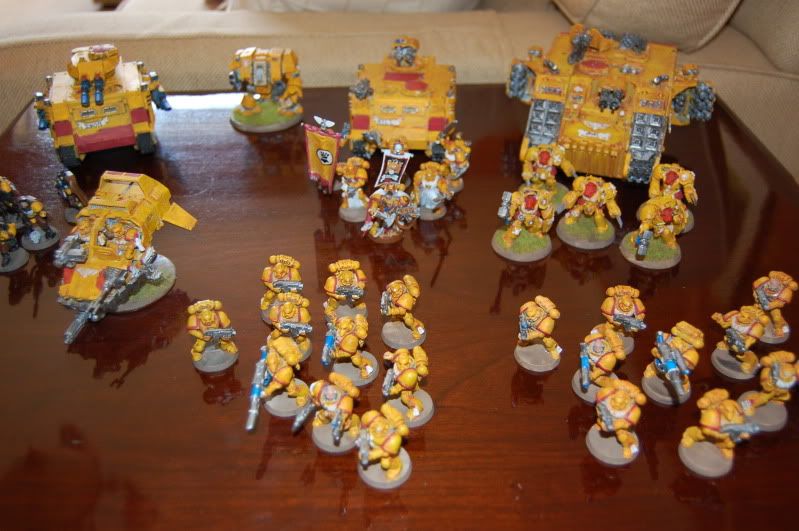
Step 39: Devlan Mud
 Marble effects are easy with washes. Uneven application.
Step 40: Static Grass
 Applied with PVA (Elmer's White) glue.
Step 41: Sunburst Yellow
 I had mentioned before that I (at the end) wasn't happy with the yellow-ness of the model. This is where I fixed that by making the yellow a little more vibrant. This would make the yellow itself a 5 step process.Well, here we are! Start to finish, one gloriously yellow Space Marine Commander! I really do not envy you Imperial Fist enthusiasts. This is far too much yellow for me. I get enough of it from my Alaitoc Eldar, but as a main color? Wow. Just wow.